music video grading in Redcode RAW

I recently co-produced a music promo for New Zealand / UK based artist Pelorus, directed by Carles Pons Altimira and shot by Albert Badaleal.
We shot the promo on a Red Scarlet in Redcode RAW. We had some lovely vintage Canon K35 prime cine lenses, which I sourced from VMI Rental in Bristol.
Carles and Albert worked with their local colourist in Barcelona, but I couldn't resist doing some tests around the workflow - roundtripping between Adobe Premiere Pro and Davinci Resolve 14 Studio - and my personal view on how a grade could be used to enhance the storytelling.

Roundtripping
My edit was done in Premiere Pro using proxies in ProRes 422 to make it all workable on my iMac. The timeline was then exported as a Final Cut XML file (I know), brought into Davinci Resolve, where the clips were relinked to the RAW files.
Enhancing the storytelling
Having the RAW files in the Resolve environment meant I had a huge amount of control over the exposure and colour.
The promo is about loneliness and loss and includes some dark and upsetting scenes. This called for a particular look, which was not only a lot darker than how most of the footage was shot, but it could benefit from some strange looking skies and environment light too.

In Resolve
I use film emulation LUTs as a basis for my projects and I created a handful of base looks, one for each typical setup, which ranged from bright outdoor shots to dimly lit interiors and night exteriors. The look I created was based on Kodak Vision 3 - 250D 5207 (NEG) with a Rec 709 Kodak 2383 D55 film look output and added 35mm film grain. All exterior shots and most interior shots were shot using available light and there was a lot of variation in exposure levels, so that had to be sorted it first, along with the white balance.
The exposure was generally brought back to under the midpoint, with inky blacks. I was after creamy highlights and warm skin tones using power windows to isolate areas that needed specific work.
A lot of the day exterior shots had a countryside setting, so the colour green needed a lot of attention. It either goes too blue or too yellow depending on the film stock chosen in the LUT and if it was shot a bit too high key I was glad to have the RAW data at hand. This required the most work.

Conclusion
All in all, it was a Sunday well spent. I don’t tend to shoot RAW myself normally and having had the vintage lenses on the Red Scarlett gave the project a certain look that I aimed to get the most out of, which was fun exploring. I’m naturally drawn to low key lighting and it was great being able to pull normally exposed footage in this direction, partly relighting scenes when needed. As I mentioned, it’s not my version that’s going out to the wider world. There are many different ways this could be approached, but that’s what’s great about it too.

Before (with colour space set to DRAGONcolor2 and the Gamma Curve to Rec.709. Desaturated and colour temperature lowered) and after (with the secondary corrections and look applied - less contrast, exposure lowered, LUTs applied, coloured exposure gradient from the right hand side and 35 mm grain).

Before (with colour space set to DRAGONcolor2 and the Gamma Curve to Rec.709. Desaturated and colour temperature lowered) and after (with the secondary corrections and look applied - less contrast, exposure lowered, shadows upped, LUTs applied and 35 mm grain).

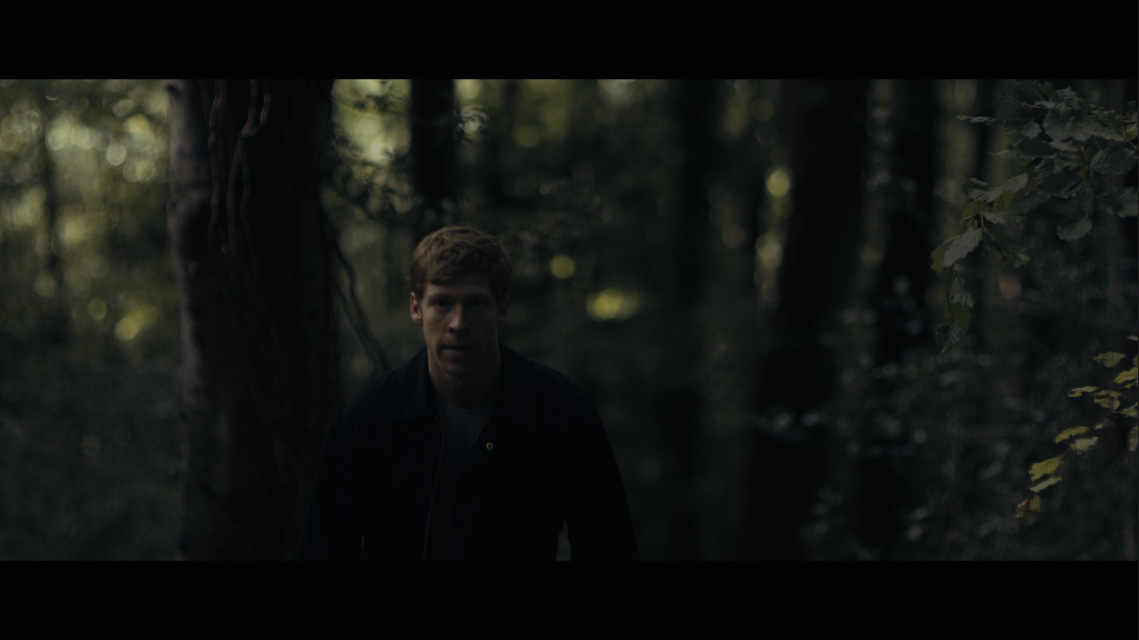
Before (with colour space set to DRAGONcolor2 and the Gamma Curve to Rec.709. Desaturated and colour temperature lowered, exposure upped) and after (with the secondary corrections and look applied - less contrast, exposure lowered, LUTs applied, and 35 mm grain).

Before (with colour space set to DRAGONcolor2 and the Gamma Curve to Rec.709. Desaturated and colour temperature lowered, exposure upped) and after (with the secondary corrections and look applied - less contrast, exposure lowered, LUTs applied, and 35 mm grain).

Before (with colour space set to DRAGONcolor2 and the Gamma Curve to Rec.709. Desaturated and colour temperature lowered, exposure upped) and after (with the secondary corrections and look applied - less contrast, exposure lowered, LUTs applied, power window on the bright part of the grass to lower its exposure and 35 mm grain).